


 Plastic is out. Up-cycling is in. Also known as ‘creative recycling’, up-cycling is all about re-purposing objects and materials that have had a former life and which would otherwise be biffed in the landfill. Not only is up-cycling good for the environment, it’s loads of fun – and as it turns out, the simplest up-cycling projects can make the most sought-after Christmas gifts.
Whether you’re out to share your care for the world with the younger generation, gift-giving on a tight budget, or just want to have some crafty fun, start your up-cycling now because December 25th is just around the corner!
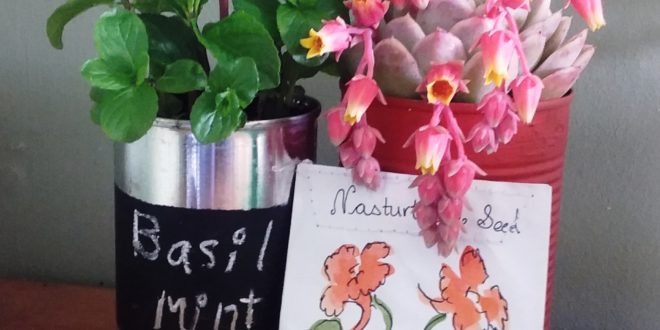
Colour-co-ordinated planter
You’ll need:
- An empty tin can (the sort with ridges is ideal)
- Hammer and large nail (to punch holes)
- Acrylic paint and brush
- Potting mix
- Plant with flowers and/or foliage to match your paint
Note: take care when working around the sharp edges of the can.
Punch several drainage holes in the base of the can. Paint the can with 2 coats of paint, leaving the paint to dry in between coats. Fill the container ¾ full with potting mix. Add your chosen plant. Top up the potting mix and water it in.

Tip: tie a home-made gift tag around the can using twine.
Can ‘o’ herbs!
You’ll need:
- A smooth sided empty can
- Hammer and large nail
- Blackboard paint and brush
- Potting mix
- Herb plant (why not grow your own from seed, or plant rooted cuttings from plants you have in the garden)
- Chalk
Punch several drainage holes in the base of the can. Take care when working around the sharp edges of the can. Paint a rectangle of blackboard paint onto the front of the can (we used a stencil to held get the edges straight). Fill the container ¾ full with potting mix. Add your chosen herb plant. Top up the potting mix and water it in. Write the name of the herb onto the paint patch.
Tip: briefly dip the end of chalk in water before writing with it. This helps prevent the letters rubbing off.

Seed sachet with love
You’ll need:
- 9 x 9cm squares of recycled paper (the unprinted side of computer paper is deal)
- Sewing machine and non-white thread (use a needle and thread if you don’t have a sewing machine)
- Watercolour paint
- Fine line art pen (we used a Unipin)
- Seeds (why not use your own saved seeds!)
Roughly decorate your squares with painted motifs (we depicted hearts and flowers). When the paint is dry, use the black pen to outline the motifs, write the name of the seeds on the pack, and add a loving message. Sew 2 squares together, stitching around 3 sides. Add the seeds. Sew up the final side of the square to make a sachet.
Tip: Team the seed sachet with a small bag of potting mix and an up-cycled planter made from a tin can.
Join the Discussion
Type out your comment here:
You must be logged in to post a comment.