


Home by Stephanie Alexander, Published by Macmillan, RRP $59.99, Photography by Armelle Habib
A blast from the past. I had not eaten or even seen a chocolate ripple cake since my teenage years. But at my brother’s party for his 70th birthday his charming neighbour Carina volunteered to make a collection of sweet dishes. She did a wonderful job. Several pavlovas, each with a different topping, an inspiring trifle, and a chocolate ripple cake served on a long, narrow platter that had belonged to my mother and that I had not seen for more than 50 years but instantly remembered from childhood. I have slightly modified the recipe.
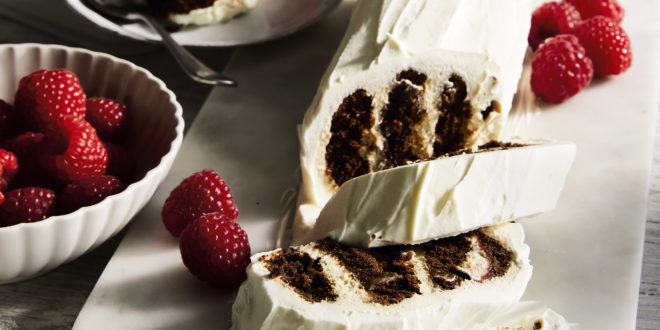
What a lovely party it was, with three of the four siblings present and three generations all mixing and sharing stories. Both of my brothers spent decades in the Northern Territory and their accounts of being in the outback and camping adventures are always fascinating. Friends who had shared some of these experiences had gathered from near and far, so there was much laughter and reminiscing. If you like to see zebra stripes when you cut the cake, be generous with the cream. If, like me, you prefer the cream to be soaked into the biscuits, use less to sandwich them but be generous with the final layer.
Serves 8
Ingredients
- 1 1⁄2 cups thickened cream
- 225 g mascarpone, kept cold until needed
- 2 tablespoons cold strong espresso coffee
- 1 tablespoon rum (optional)
- 1∕3 cup best-quality raspberry jam
- 1 packet chocolate ripple biscuits
- raspberries or strawberries, to serve
Method
Select a narrow plate on which to build your ripple cake. Whip the cream to firm peaks. Separately scoop the mascarpone into a small bowl and work with a spatula until smooth. Mascarpone becomes grainy when it gets too warm, so only remove it from the refrigerator to the bowl once the cream has been whipped. Fold the mascarpone into the whipped cream.
Mix the coffee with the rum, if using.
Assemble your ingredients and utensils: a pastry brush, the bowl with the rum and coffee, the jam in a bowl with its own spoon, the bowl of the cream mixture and a separate spoon, a long flexible metal spatula, and the biscuits.
Spoon a thin layer of the cream mixture down the centre of the serving plate – this is where you will plant your dressed biscuits.
Take your first biscuit. Very lightly brush the flat side with the coffee/rum mixture and follow with a small blob of jam. Plant this biscuit standing upright at one end of the cream on the plate, ripple side to the outside and the flat side ready for the next biscuit. Take another biscuit. Very lightly brush the at side with the coffee/rum mixture and a small blob of jam, but this time spread a dollop of cream on the ripple side. Place the cream side against the first biscuit and gently press. Repeat this last step with the remaining biscuits: coffee/rum mixture and jam on the flat side, cream on the ripple side, then plant. Don’t use all the cream – you need enough left to coat the log just before serving. When you have finished the log, use the spatula to neaten the cream that will have oozed from between the biscuits. This is good. Using some of the cream that remains, spread a thin layer over the sides and ends of the log, leaving enough for a final coat after its overnight rest.
Insert a few toothpicks into the log and cover with plastic film – the toothpicks will hold the plastic away from the cream. Refrigerate the log and the remaining mascarpone cream overnight.
To serve, unwrap the log and apply a fresh coating of mascarpone cream. Surround the log with berries and slice to serve.


Join the Discussion
Type out your comment here:
You must be logged in to post a comment.