


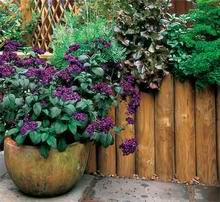
 Raised garden beds have many advantages. Obviously, they are a wonderful feature in a garden. They can be filled with a different type of soil than in the rest of the garden, allowing you to extend the range of plants you grow. The added height not only makes them a great design feature, but also means they’re easier to tend, especially for gardeners with back problems or those in a wheelchair.
Raised beds are also very flexible and can be made to whatever height or size you choose, and from whatever materials you prefer. You can also select the site in your garden to best benefit what you would like to grow – choose a sunny or sheltered spot, depending on your plants.
 Great for new gardeners
Rookie vegetable gardeners may like to start with a small raised vegetable or herb patch. Fill a raised vegetable garden with garden mix, rather than topsoil ad you can almost literally watch your garden grow!
Herbs are great grown in a contained area – they like to be sheltered, and some, such as parsley can tend to take over if they have free rein in your garden.
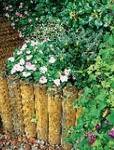
Below are instructions to create a raised garden, but remember it is also fine to dig out a patch and recycle old bricks or railways sleeper for a faster and cheaper alternative. Bricks make for a permanent structure and you could add a wider top for a seat.
 Build your own raised garden
- Materials
- String and canes
- Tape measure and pencil
- Spade
- 36 round poles, 90cm long x 10cm diameter
- Roofing batten or similar
- Spirit level
- Saw
- Electric screwdriver
- Zinc-coated screws
- Hammer
- Felt tacks
- Post-fixing concrete mix
- Heavy-duty polythene
- Topsoil
- Compost (multi-purpose or ericaceous), grit if needed
 Select a suitable site for your raised bed, measure it out and mark the shape using string and canes. Stand back and make sure you’re happy with it before you start digging.
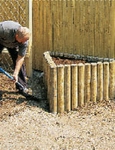
Dig a trench about 20-30cm deep using the string line as a guide. Check the depth using one of the poles to ensure the sides will be the right height.
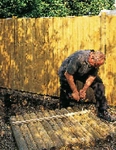
Make up each side of the bed by laying out the poles on a flat surface, ensuring the ends are level, then screwing a piece of roofing batten to one side, top and bottom.
 Position the sides in the trenches you’ve dug. If necessary, ask a friend to help hold them in place while you work. Leave room to insert an extra pole at each corner.
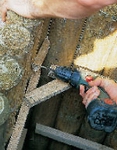
Use a spirit level to check the sides are upright and level across the top. Stand the corner poles in place. Screw a short piece of batten across each corner as a brace.
Screw on some shorter pieces to fix the corner poles to the side sections. As they won’t show, these don’t need to be overly neat, but they must be well secured.
Concrete in the corner poles using a post-fixing concrete mix, then fill the rest of the trench with soil and firm in. Line the bed with polythene, stapled or tacked in place.
Fill the bed with a mix of topsoil and compost. Add grit for alpines or garden compost for vegetables. Use ericaceous compost for rhododendrons and camellias.

Join the Discussion
Type out your comment here:
You must be logged in to post a comment.