


A few months back, a friend who was travelling in Uganda emailed me with tales of a delicious national dish they were enjoying. ‘Sukuma wiki’, they said, was on their plate on an almost daily basis. I don’t how long I spent hunting on the net for what they described as ‘a tender green served up in a spicy, tomato stir-fry, with a crunchy topping of roasted peanuts or sesame seeds’, but I finally tracked down ‘sukuma’, the vegetable, and discovered it was a perennial kale.
Also, at times, referred to as ‘collard greens,’ it is one of the easiest and fastest leafy edibles to grow in the home garden. Because it doesn’t need to be sown each year, as most vegetable greens do, it is always in the garden when we go looking for it.
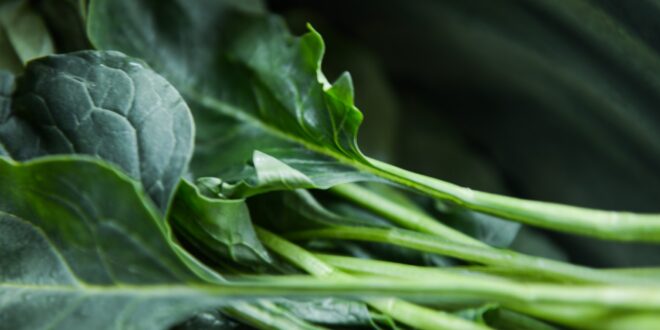
While many turn up their noses at the mere mention of any variety of kale, the secret to using the perennial version of this versatile vegetable is twofold. Firstly, it needs to be used as a young and tender (rather than a mature) leaf, and secondly, we should look abroad for recipes which enhance our enjoyment of it.
To grow perennial kale, source your seed from the likes of ‘Kings Seeds’ or ‘Trade Me’. Be aware there are a number of different perennial kales, and if you are looking for something especially interesting, head to ‘Kahikatea Farm’ for a plant of the 2m high version, called ‘Walking Stick’ kale (it has a stem which can be dried and used as a walking pole). Alternatively, if you have a friend who has a perennial kale in their garden, ask for a slip (a ‘sucker’) from the base of their plant. Pot it up in damp potting mix until it grows several new leaves, then plant it into your garden.
In cool districts, sow the seed of perennial kale into containers of fine seed raising mix in spring and summer. In warmer parts of the country, the seed can be sown right through autumn and early winter. Keep the seed raising mix damp, but not wet. Wait for the seeds to develop 3 or 4 true leaves (these are the leaves that follow after the first two tiny leaves appear when the seed germinates). Once these true leaves are looking strong, gently prise the small seedlings from their seed raising mix, and nestle each into its own container of potting mix (a takeaway coffee cup – with a hole in its base – is the perfect sized pot to use).
When the seedlings are 10-15cm high, it’s time to plant them into your garden. Because the plants are perennial, and keep on giving, 3 or 4 collards will usually be ample for a couple or a small family. Prepare the garden for your collards by adding several buckets of compost per square metre, along with a couple of buckets of well-rotted animal manure (or sheep pellets, which can be purchased from your local garden centre). Add a sprinkling (3-4 handfuls) of garden lime, and fork everything together. Water the area well, and plant out the seedlings 60cm apart. Cover them to protect the young plants from birds. Keep your collard greens producing young, tender leaves by giving them a feed of liquid manure every 3 weeks.
To find international recipes that use perennial kale, check out Sukuka Wiki, Southern-style Collard Greens, and a host of others. With the rising cost of fresh vegetables unlikely to wane any time soon, there is more reason than ever to begin growing perennial kale yourself. And if you do decide this vegetable is not to your liking, your backyard chickens (or your neighbour’s) certainly will!


Join the Discussion
Type out your comment here:
You must be logged in to post a comment.