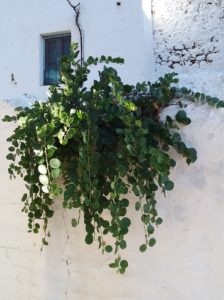
If you thought capers were something to do with nasturtiums, think again. While it’s true that the peppery-flavoured buds of nasturtium are sometimes pickled as mock-capers, the real thing is a whole lot different – and in New Zealand, a lot more tricky to grow!
Capparis spinosa, to give the caper its botanical name, is regarded as a shrub which grows to around a metre in height. However, in the Mediterranean (when not being commercially cultivated) it is more likely to be recognised as a small trailing plant hanging from a crevice in a stone wall. Once established, capers like the driest of conditions, and will tolerate a light frost. They like to be sun-drenched (year round if possible), and to grow in very well drained positions. They will happily inhabit a seaside location due to their ability to withstand salty conditions.
Which part of the plant is pickled?
In New Zealand, we eat only the buds of the caper plant – while in many other parts of the world it is not uncommon to enjoy the pickled leaves as well. The buds are borne on the bushes in all seasons apart from winter. Unpleasant to eat fresh, they are picked, salted, and left to rest for 2 days. They are then rinsed and bottled in a vinegar brine. The leaves, when used, are bottled along with the buds.
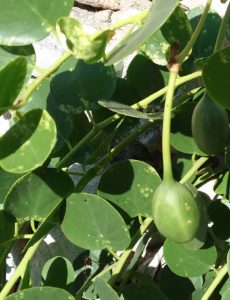
Left to grow on, the buds eventually swell, then open to display a very beautiful creamy-white flower with deep purple stamens. The flowers are usually short-lived due to the hot conditions in which they bloom. Once the blooms are spent, a stout seedpod develops.
Can we grow capers in New Zealand?
It is possible to grow caper bushes in New Zealand, yet many gardeners give up before they even get started. That’s because capers have a reputation for being ‘difficult ‘. However, ‘difficult’ is perhaps not the best term to use because the real source of the perceived problem is that caper seeds take a very long time (several months, in fact) to germinate. Used to seeing seeds germinate in a matter of days, or at the most, weeks, gardeners often give up waiting and biff their caper seeds in the bin before they have a chance to sprout.
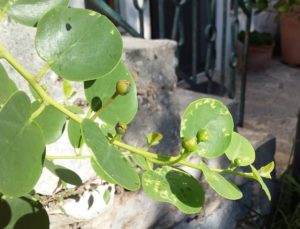
If you want to try your hand growing caper bushes, use these tips to get you started:
- Stratify the seed before you sow it (stratification is the process of chilling seed in a fridge to help create the ‘winter’ season it requires to germinate).
- Cosset the plants in small containers (in the greenhouse if you live in a cool region), and don’t let the seedlings dry out while they are becoming established.
- Unless you have exceptionally well-drained soils in your garden, consider planting your caper bushes in very deep containers filled with cacti mix (capers have roots that can go down in excess of a meter).
- Prune your bushes in autumn to encourage the development of buds (which grow on new wood).
- If you have no luck germinating your caper seeds, consider taking cuttings from a friend’s plant as caper bushes will propagate in this way.



Join the Discussion
Type out your comment here:
You must be logged in to post a comment.