


The price of parcel post is skyrocketing. So much so that the gift you want to post to a friend can end up costing less than the stamps you stick to the wrapping paper! Now you can make the cutest of celebratory gifts at home for just a few cents, and post it for the price you’d pay to send a letter.
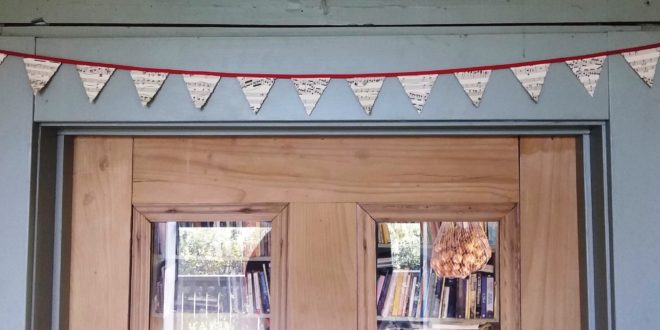
Mini-bunting is a bright seasonal decoration which can not only be displayed on the day of the celebration but can be left hanging in the home to be appreciated by everyone! String it up along the top of a door frame, across a bed end or over a window. Use it to edge kitchen shelves or bookcases. Wherever mini bunting is placed, it spells cheerfulness and reminds its recipient of your thoughtfulness in making and posting it.

What you’ll need
- 1.5m of 8mm wide colour-appropriate bias binding (use gold or silver biding for a wedding anniversary, pink or blue to welcome a baby, purple at Easter, and red or green at Christmas) etc)
- Matching thread
- Recycled sheet music (look for it in an op-shop or garage sale – the older and more discoloured the paper, the more charm it can have!)
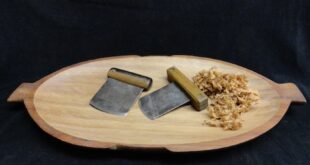
- Pinking sheers or deckle paper edging scissors
- Sewing machine
What to do
Using your pinking sheers or deckle paper edging scissors, cut out 14 little triangles from your recycled sheet music. Each triangle should measure 6cm at its top edge and 6.5cm at its side edges. Make sure the lines of music run horizontal to the upper edge of the triangles.

Once you have cut out all your triangles, slot the first of them into the fold of the bias, 15 cm in from the end of the binding. Use your sewing machine to stitch carefully along the bias (beginning at the end closes to the triangle) so you catch the triangle into the stitching. Leave your sewing machine needle down so it is piercing the bias binding.
Slot your next triangle into the fold of the bias binding 2cm along from the first triangle. Stitch it into place, leaving your sewing machine needle down so it is piercing the bias binding. Continue in this way until all the little triangles are sewn into place. Stitch to the end of the bias binding.

Now you are ready to make loops in the bunting so it can be hung up. To do this, fold each end of the bias back on itself to create a loop, and stitch down the ends of each loop.
When posting your gift, arrange the bunting so it fits into a regular sized envelope that is no more than 2cm wide. A good way to keep it in place inside the envelope and to ensure that it doesn’t bunch up is to fix the bunting to a piece of card with paper clips.
Variations on a theme
Your bunting triangles can be made from most materials (but bear in mind that the thickness of the material will dictate whether the finished string of bunting will fit the dimensions of a standard envelope). Use old gift cards, colourful calendar pictures, pages from old books or stiff coloured wrapping paper. Let your imagination run wild!

Join the Discussion
Type out your comment here:
You must be logged in to post a comment.