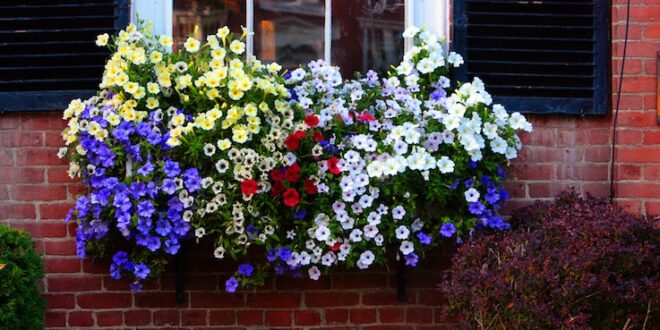
Spring weather is surely just around the corner, and before you know it, you’ll be looking for living colour to brighten your balcony and bring drama to your deck. Container grown annuals are the way to go, yet these potentially delightful eye catchers so often disappoint, especially when we compare them to the gorgeous tubs, over flowering with colourful blooms, in parks and other public spaces. So just how do you get your container grown annuals to look like the ones grown by the professionals? Read on to find out our top tips!
Sow your own
No one knows what pests and diseases they are buying into when they purchase seedlings from a garden centre. Aphids may be lurking under leaves, black spot may be poised to raise its ugly head, and fungal spores could be hidden in the soil. So grab yourself a bag of sterilised seed raising mix, three or four packets of seed, and get sowing. You don’t even need seed raising trays. Just don your garden gloves and N95 mask, and lie the bag of mix flat on its side (on a surface that won’t be stained as water drains from the bag). With a sharp knife (a craft knife works well), pierce several drainage holes in the lower side of the bag, and cut several rectangles of plastic out of the upper surface. Add moisture, and sow your seed (one variety into each rectangular space).
Choose the right fertiliser
There’s a reason why some tubs of annuals flourish and others don’t, and it’s all down to using the right fertiliser for the job. Before you reach for any old container of slow release fertilizer pellets, check the label. Warm season annuals will happily bloom from late spring right through until autumn, but only if you enrich the soil with fertiliser that releases slowly over a six month period. And only if it’s specially formulated for containers and tubs. A general vegetable garden fertiliser won’t have the same supply of phosphorus – the crucial ingredient which promotes flowering.
Spacing
Next time you spot a flourishing tub of potted colour, take time to count the number of plants growing in it. You may be surprised to find there are only two or three. Annuals are fast growing, and quickly bush out as the weather warms up. The impatient gardener wants to hurry things along even further, and consequently plants double the number in the same given space. The result is overcrowding, with little or no room for air to flow between the foliage. As soon as air flow is impeded, fungal disease arrives, and before you know it, your plants are wilting and mildewed, and their stems are covered in frothy white fungus. Remember, less is more, and be restrained with your planting!
Pinch me!
An annual which simply bursts with blooms is no accident. To encourage loads of flowers from just one plant, you need to start early with ‘pinching.’ Pinching is the practice of nipping out the central growing point or points of a young plant. Do this before the plant blooms (it may even require you to remove the first few unopened buds, but the end result is worth it). The result is a plant which produces more stems, with potentially more flower buds.
Dead heading
A plant’s whole purpose is to flower and set seed so it can produce more plants. Your purpose, as a gardener, is to keep your gorgeous annuals flowering for as many weeks as possible. To do this, as soon as a bloom is spent, nip it off with a sharp pair of nail scissors. This not only signals to the plant to produce more flowers, it also prevents the dying flower (which will often attract disease), spreading any nasties through the whole container.
Watch the water
There’s a lot of oxygen trapped in the pores of soil. Plants breathe that oxygen through their roots, but not if you keep the pores permanently filled with water. Water your container of flowers only when the soil is dry to a depth of 2-3cm, and make sure you empty the drip saucer so the plant is not sitting in its own water. Never water from above, or your plant foliage will remain damp, and attract diseases that like a humid environment. Always water around the base of plants.
Easy does it
Some of the most stunning containers of colour are filled with the most humble of annuals. That’s because the likes of marigolds, nasturtiums, and alyssum are star performers, and are able to handle most conditions. By all means experiment with the seed you sow, but be sure to have the seedlings of old faithfuls on hand to fill gaps!
Container growing annuals isn’t rocket science. By following a few basic rules, you’ll soon have the overflowing pots of colour you so admire in public spaces. So why not start on the road to brightening up the balcony, today!


Join the Discussion
Type out your comment here:
You must be logged in to post a comment.