


The busiest spud gardening season of the year is on our doorstep, which is why we went to some of the best spud growers for top tips on how to succeed with this king of crops. So, whether you’re a beginning gardener or have been working the soil for decades, read on!
Potato perks
Seed potatoes don’t come cheap, but you can double, or even triple their value with this tip: Buy half the seed potatoes you actually require. Identify the ‘eyes’ (the shallow depressions in the skin from which sprouts will eventually shoot). Next, take a sharp knife and cut each potato in half so that both pieces have at least 3 ‘eyes’. Larger potatoes with a greater number of ‘eyes’ can even be cut into 3 pieces. Store the cut seed potatoes, in a single layer (and, ideally, at a temperature of 3-4°C) for 5–10 days for the cuts to heal over before planting them. Note: seed potatoes with fewer ‘eyes’ produce fewer, but larger, potatoes.
Fine tuning
Spuds are such an exciting plant to grow, which is why potato gardeners are forever trying to fine-tune their methods in order to get the very best from their seed. So here’s a tip: Spuds intended for eating, are best stored at temperatures between 4.5 and 7°C. However, seed spuds are a different kettle of fish. Between purchasing your seed spuds and sowing them, the seed is best stored, for a couple of weeks, at temperatures of between 10 and 12°C (and, if possible, at a high – 90% to 95% – humidity level). These conditions help heal any bruising or other damage the seed has incurred as a result of packing and transporting, and reduce the chances of the seed rotting once it is in the ground. If, after a couple of weeks, you’re still not ready to sow the seed, continue storing it at between 1 and 3°C. This reduces the chances of it sprouting before you want it to.
Peel and plant
Towards the end of the season, potatoes at the bottom of our kitchen bin sometimes look wizzened and tired, but if you’re planning a garden, don’t be tempted to throw them out. Instead, peel them thickly, and plant any of the peels containing at least one ‘eye’. If you’re not confident your peel will grow, and don’t want to waste precious space in the garden waiting to find out, test drive the peel first by popping it into a small planter of soil. If a sprout appears, gently up-end the planter and place the plug of soil, with the peel in it, into a prepared garden space.
Double the value
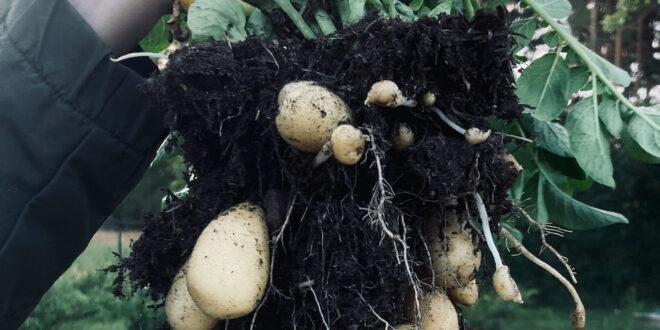
Potatoes will grow in almost any damp organic material (with the exception of fresh lawn clippings, which produce so much heat as they decompose the potato seed will be ‘cooked.’) Potatoes take between 3 and 5 months to produce a crop, depending on where in the country you live. When you grow potatoes in garden mulch, decaying straw, or baylage, or even a pile of damp leaves, you can produce a potato harvest and compost at the same time! By the time you come to harvest your spuds, the organic material will have broken down and be ready to grow another crop, or it can be shovelled onto an ornamental bed to nourish your plants.
Rock solid
Spuds don’t require a garden bed to grow in. Provided they are planted into a growing medium at least 20cm deep, and are covered with a further 15cm of medium, and the medium is kept damp (not wet), the seed will grow, even on a solid base. So you can actually grow potatoes on a ‘temporary’ garden created on top of lawn or a concrete path! Note: some materials (such as treated timber) contain toxins, and shouldn’t be used as a base on which to grow potatoes.
If you love fresh potatoes straight from the earth, now is the time to start planning for them!

Join the Discussion
Type out your comment here:
You must be logged in to post a comment.