 Your modem is your home’s gateway to the internet.
If your home internet’s not working, the first thing to check is your modem. Often, restarting the modem will solve the problem.
Knowing how to DIY trouble-shoot a modem is something that people of all ages would benefit from learning. The good news is, most of the things that ever need to be done with a modem are just a simple series of steps.
By learning to do them for ourselves, we become more independent and we get back online quicker!
Follow these steps to check your modem for a problem and to restart it:
1. Check your modem’s power
Make sure it’s plugged in and turned on (we’ve all made that mistake before!)
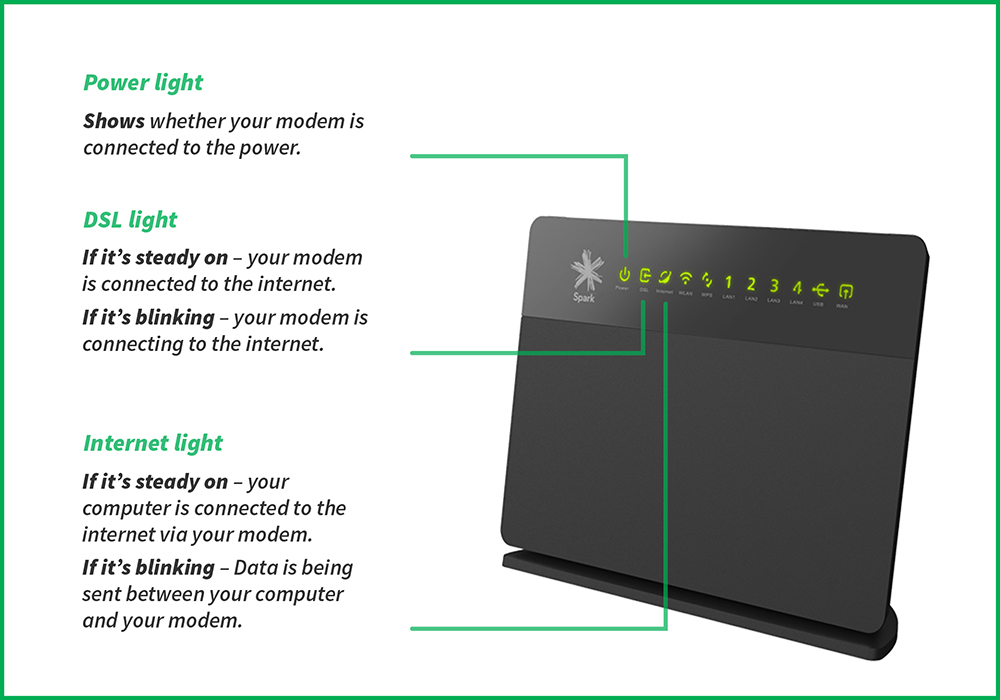
 2. Check that your ‘DSL’ light is on
This is shown in the diagram below and is sometimes labelled ‘broadband’. For the internet to be working, your modem’s DSL light needs to be on solid. If it’s not on, check that your cables are all plugged in.
3. Check all your cables
Make sure you’ve got a cord plugged into the back of your modem where it says ‘DSL’. The other end of this cord should be plugged into the wall jack point (see the images to the left).
4. Restart your modem
Turn the power off at the wall. Wait ten seconds, then turn the power on again.
What the lights on your modem mean:

Got a question? Ask the Age Hackers in the comments below.


Join the Discussion
Type out your comment here:
You must be logged in to post a comment.